Monday, June 29, 2009

You know you want to...

If you want to join me in my newest fixation - quilting - head on over to http://crazymomquilts.blogspot.com/ and check out her post scraps to enter for a chance to win a bunch of great scraps from a beautiful quilt she made. As you all know, I love using scraps since it's such a great variety and the kind of challenge I like (to design something around the shapes and colors). Just a little tip!

And, in case you missed it before it sold on etsy (in less than 3 hours! absolutely shocking!!), here is the latest quilt I made. Thank goodness it sold quickly because I was falling madly in love with it...

Notice my sweet boy's toes sticking out from underneath?
Such a good helper, that one!


Pin It

Friday, June 26, 2009

no more teeth marks...

So, I'm still feeling great since opening my little etsy shop and just so happy I put it out there. Taking that little risk was my small thrill for the month. :) I could not have done it without the overwhelming support and encouragement of my family and friends - thank you!

And, I told my husband as I was working on the pieces to list that after Tuesday's "grand opening" I wouldn't sew for the rest of the week....sometimes I say the silliest things. As if I could stop sewing.

To that end, here is my latest project: a crib rail teether/guard/bumper thing. I'm sure there's a technical name for it, but it eludes me. I had one of those stick-um rail protectors for my serious chewer and he quickly figured out how to peel back the industrial strength adhesive. So not only was my baby chewing plastic (let's not think about that too much), but now he could get to the wood and paint I was trying to keep out of his mouth in the first place, and it looked really ugly on top of it all. I did a google search for other options and stumbled upon this tutorial. I made my own version with pre-quilted fabric (I backed it with broadcloth) and just happened to have organic cotton in just the right shade of green to match (love when that happens!). Since he has no interest in the side rails (only the front rail for some reason), I only made a single front one. Now he can't chew the wood and he really likes touching the soft fabric wen he wakes up from a nap. So sweet. Here is a gratuitous close up of said squishy quilted fabric.

Pin It

Tuesday, June 23, 2009

Ta-Da!

The etsy shop that seemed like it might never happen is a reality!!! And almost an hour ahead of schedule, I might add. I guess it helped that I stayed up until 2am last night to finish the piece de resistance: the quilt. (I was a lit major, if you haven't guessed)

I loved loved loved making that quilt and I feel surprisingly good this morning even with the lack of sleep...sort of like having a newborn in the middle of the night, but a lot less crying.

But anyway, please go check it out just so I don't feel lonely over there... HandmadeMommy.etsy.com.

Thanks for all your support. I cannot tell you how much it means to me.

Have a great day! I'm off to get some Starbucks... Pin It

Sunday, June 21, 2009

Sneak Peek


Here's a little sneak peek of what's to come on Tuesday... I don't have a ton of items to list, but what is ready I'm happy with and I really enjoyed making them. Once I tiled the crops this way, they look so random. Haha...random is good, right?? Hope you enjoy seeing what I put up on Tuesday!

Oh! And, the tag on the bottom left image is my HM logo custom-made by my Dad. It looks so clean and professional...much unlike my work area. :)


Pin It

Wednesday, June 17, 2009

Everybody's Doing It

Apparently, the weather warms up a little and everyone gets the itch to make a skirt. Clearly, I've been a little fixated on skirts (see here, here, and here), and it's good to know I'm not the only one.

I just checked out Grosgrain and saw that she has a tutorial for a quick skirt. Think of a much more streamlined, easy, and straightforward version of my apron skirt...though not like mine...oh, you should just go check it out because they are super cute!

Twenty minute Simple Skirt Tutorial AND GIVEAWAY!!!!

Enjoy! Pin It

Tuesday, June 16, 2009

Great Friends, Great Party - a hostess gift wrap

Over the weekend, we went to our friends' house and took a "thanks for the party" bottle of wine. I wanted to do something other than a wine bag (everyone knows what's in there anyhow) but, as always, I didn't have all day to figure it out.

Here's what I came up with using some printed paper (scrapbook or wrapping paper would both do the job), decorative edge scissors, ribbon, and a bottle of wine, of course.


First, I cut a length of ribbon twice the circumference of the wine bottle. Easiest way to do this is to wrap the ribbon around the bottle twice.

Then I cut a piece of paper slightly taller than the bottle's label and just long enough to wrap around the bottle and leave the front label peeking out. (it's always fun to get a sneak peek at your presents) Using the decorative scissors, I cut a cute design across the top and bottom edges.

I laid the ribbon across the middle of the paper on a flat surface and wrote our gift message above and below the ribbon. Then I put it all together and tied it up. Done! Pin It

Sunday, June 14, 2009

The Little Etsy Shop That Could

I've been putting off my etsy shop for one basic reason: what if no one likes what I make?

I know, I know, those worries don't get us anywhere, do they? So, I've decided that next Tuesday, June 23rd, is the big day. I'll list some little things I've made. Please look at them to make me feel better, and at least I'll never wonder "What If?"

I hope you take a little risk for yourself soon. :) Pin It

Reagan's Dress

I just made and gifted a dress to sweet little Reagan, one of my son's friends. I used the Smocked Sundress pattern from Weekend Sewing and it turned out super cute.

I didn't want to limit the life of the dress, so instead of hemming up the bottom, I did a wide pleat along the hem (perhaps there's a technical name for this...). The hope is that as she grows taller, maybe her Mommy (or me) can let the hem down. Besides being practical, it gives a nice weight to the bottom of the dress and helps it hang nicely.

Oh, and with some extra fabric I had, I made a little drawstring purse to go with the dress. A girl can never have too many purses.
Pin It

Friday, June 12, 2009

Who needs a pattern?? (skirt tutorial)


I have a confession to make: I don't like pinning, pressing, or patterns (the 3 P"s of garment sewing, if you will). So, you may ask, what business do I have making clothing? Great question. I have no idea.

But, I may have found a happy compromise - designing as I go. Oh, and you should be forewarned...I'm the quick and dirty sewing type and I make no apologies for it. Since my sewing/crafting is allotted in nap-time-increments, I try to get as much done as quickly as possible.

To that end, here is a rather haphazard tutorial to make a sweet little skirt, in an apron style. Enjoy and ask questions if it's wonky.

I bought the last bit of fabric on a bolt that I just couldn't resist, about 30" total (love how inexpensive it is buying that way). Not much to work with, but I loved how girly the fabric was and thought I could make a skirt to wear to a wedding or shower. Here's a closeup of the fabric...

Brought home the fabric, prewashed it, and just cut it in half to make the most of what I had. I also ironed the selvage wrong sides together to create a hem.
hint: whenever possible, I use the selvage on the edge of my project to save time hemming and edging...remember: quick & dirty


Next, I gathered the top edge (waist-to-be) of each piece to roughly half my waist measurement. You'll also notice that the design on the fabric fades to a white border at the selvage - ready made hem placement. My kind of sewing!

I placed one gathered half on my lining fabric (Kona muslin left over from a quilting project), and roughly (very roughly) traced the shape onto the lining fabric.
To make this even easier, use an outer fabric that has enough body it doesn't require lining.


Anyone who really knows what they're doing is probably cringing, but hey it worked.
I cut it out and then laid it out on another section of my lining fabric and cut out an identical piece. Here are what your pieces look like now: 2 lining pieces and 2 outer pieces.

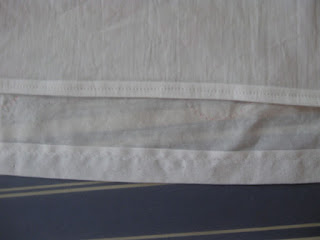
I sewed each gathered piece to one lining piece to make sure my gathers didn't shift. After this, I folded the bottom edge of my lining 1/4" wrong sides together, and then again 1/4" and sewed them for a finished hem on the lining pieces. The picture below shows the wrong sides of my lining (on top) and outer fabric (underneath) after they have both been hemmed.

This is when each piece actually started looking like half a skirt.

Then I created a waistband. I didn't get a picture of this but it's super easy. First determine how wide you want your waistband. Double this and and a half inch. This will be the width of your cut waistband fabric. For length, add about 6 inches to your waist measurement. If you have a little too much extra, you can always trim it off later (quick & dirty...). Cut your piece of fabric for the waistband and iron it in half the long way. Then cut it in half along the width. You'll now have two pieces - one for the front of your waist and one for the back.

Now...unfold one waistband piece and align the long edge with one skirt half, right sides together, and pin in place (see picture below). Sew all 3 layers together with slightly less than a 1/4" seam allowance. Repeat for the other waistband piece.

Now, refold the first waistband piece and sew the top edge (shown sewn below). Pin through all layers of skirt outer, lining, and waistband doubled over (also shown below). Repeat for the other half of your skirt.

This is the same step as above, but shown from the inside of the skirt. Notice how I planned to have the selvage line up how it did. Quick & dirty. Quick & dirty.
And, here is one of your completed waistband pieces attached to the skirt front - looking pretty good...

Finally, I sewed the front and back together at one side. I left the other side unsewn to insert the zipper. This was the first time doing a zipper in a garment so be kind. My technique is lacking, I'm sure.

From here, I just pin-fitted it both on my dress form and on me to bring in the sides and waist to perfect the fit. It's a nice shape because it's so forgiving on lots of figures. But, I won't lie, this part takes time. After much tweeking, I can finally say I made a skirt!

The picture below was taken late at night (when all great sewing projects are completed in our house) so it's not a perfect representation, but I'm really excited to wear it out.
Pin It

Monday, June 8, 2009

New fun crafty blog and giveaways!

I just stumbled upon a very sweet blog called Grosgrain Fabulous and besides being immensely crafty (and having great photos!) she also has some very fun giveaways. Come on, who doesn't like a giveaway?? So, here you go...

Vintage Earrings Tutorial and GIVEAWAY!!!!

Vintage Wedding Refashioned Frock GIVEAWAY!!!!

Marseilles Dress SHABBY APPLE GUEST GIVEAWAY!!!! Pin It

Sunday, June 7, 2009

Yet another version of Heather Ross' free dress pattern...


I love the ease of this pattern and kept thinking I could do it more justice (the last two versions didn't shine like I hoped: see #1 and #2). Well, I may have finally done it with version #3!

Here it is in an Amy Butler Midwest Modern print (I love this print...where I bought it) with spaghetti straps (remind me later how little I enjoy making spaghetti straps). I used french seams on the sides, and left out the pockets since I only carry bulky, heavy things that moms need and unfortunately never use the pockets in the other trials. Additionally, I also took six inches off the hem since I am no amazon (though I would love to be...). Overall, I think it turned out great. Pin It

Friday, June 5, 2009

Applique Crazy

I have done some appliques lately for the kids and just love doing it. Not technically hard (except for drawing in reverse on the fusible stuff...). If you need to make a personalized gift, this is the way to go - people are never underwhelmed when they see it.

Here are couple of little bucket hats I made - one for a friend's kiddo and one for mine.

And, here is the birthday boy shirt I made for my youngest for the big bash. A proud number one on the back. Since he's generally crawling somewhere very quickly I thought a one on the front would be a loss. There is also a star on the front pocket but no good pictures of it. I love this picture of my boys...
Pin It

Tuesday, June 2, 2009

Apron Top


I've been just crazy about making summer clothes. As soon as I get a whole new summer wardrobe completed, I know summer will be over and I'll then become completely engrossed in fall clothes patterns and fabrics.

But for now, I can just enjoy summer clothes goodness. Here is an apron top I made using this tutorial I found. I added a section of jersey in the back because I'm not comfortable showing my back or going bra-less. Such a mom...


I made the straps wider than the tute calls for (I think I doubled the width, but I can't recall) and will be adding another set of loops between the top two sets just to get a better fit, but overall I am actually really happy with it.

Hope you're enjoying beautiful summer weather today! Pin It

More Handmade Goodness

Related Posts with Thumbnails