Thursday, October 29, 2009

Jambalaya!

Blogging about cooking is a bit of a departure for me, but I just couldn't keep this to myself. The weather's cooling off and I'm more inspired to cook in the cool months for some reason. Last night I made jambalaya for the first time and it was a huge hit around here. Be forewarned: this is pretty spicy for little ones. And I'm not the most precise cook in the kitchen. What fun is creating if you have to always follow someone else's rules?

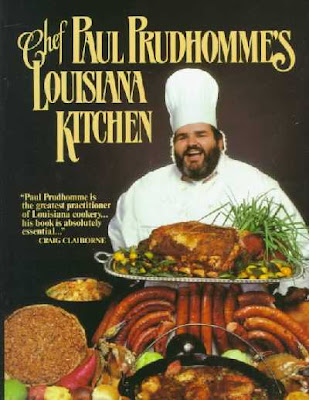
I started off with the Joy of Cooking and Betty Crocker cookbooks but wasn't sold on either alone. This is sort of a melding of the two with some inspiration from my father-in-law's love of Paul Prudhomme (the cookbook cover above) and my love of the slow cooker.

So go forth and cook with abandon!

ingredients:
olive oil
1/2 an onion, chopped
3 celery stalks, chopped
3 garlic cloves, chopped
1 small green bell pepper, chopped

1 32oz. container of chicken broth
2 large tomatoes, cut in chunks

about 1 t black pepper
couple shakes white pepper
few shakes red pepper (ground or flakes)
about 1/2 t dried thyme
about 1 t dried parsley
2 bay leaves (remove these before serving)
I used dried herbs, but fresh is always great; also, I used approximations since I just shook them in until it looked right to me

16 oz kielbasa, sliced into 1/2" pieces
2 chicken breasts, cubed (this can be frozen if you don't think ahead...such as I don't)
1/2 pound shrimp, cleaned & deveined, defrosted if necessary
use more shrimp if your budget allows, you can never have too much shrimp
or use any combination of these proteins, you don't need to have all 3

3/4 cup uncooked rice


directions:
Put a little olive oil in a pan and cook onion, celery, garlic, and bell pepper until tender.

Transfer this to a large crock pot and add chicken broth, tomatoes, and herbs, and stir together.

Next, add your kielbasa and chicken. Cook on high for 1-2 hours (or low for 3-4), or until you feel the chicken has cooked through. After this you can let it sit on low temperature for a couple hours until about half an hour before you want to serve.

Half an hour before serving time, crank the crock pot up to high and get it hot. Stir in your rice, turn the crock pot down to medium heat, and cover.

After about 20 minutes, add your shrimp. Let it cook until the shrimp is pink and curls into little C's, about 10 minutes. Your rice will not be mushy and it actually tastes better with some texture to it.

Serve it up and enjoy the fruits of your labor! Gotta love the cold weather foods...

ps: we were too hungry to take a picture of the actual meal...maybe next time. Pin It

Sunday, October 25, 2009

Sweet As Pie

Our friend's absolutely precious daughter just turned two and, of course, I made her some little birthday gifts.

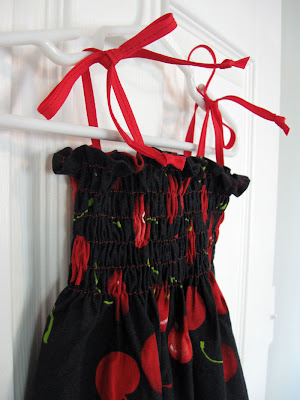
I've had this Alexander Henry cherries fabric forever and never found just the right project for it...until now. It started out as just a crayon roll based on this tutorial (slightly different dimensions to accommodate the chunky crayons, and oilcloth for the inside). But that paired with a coloring book didn't seem like quite enough.


So, I whipped up a dress to go with it using Heather Ross' Weekend Sewing pattern. So adorable. Oh, if I ever have a girl, the poor thing will have more homemade clothes than she knows what to do with...

a close up for the smocking and ties
Pin It

Friday, October 23, 2009

Something Blue


My youngest cousin got married a couple months back and I just finished her wedding gift. I'm always so optimistic about how long it will take to finish something...

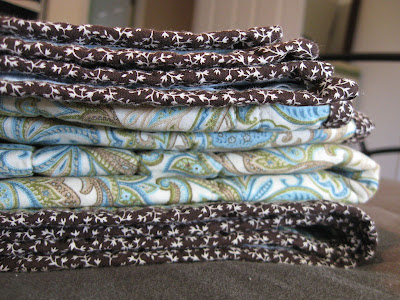
But, here it is: a quilt in blues and browns. The blue on the back reminds me of Tiffany's. And blue is just a great wedding color.


Two solid pieces of quilting fabric from JoAnn's, each measuring 1 1/2 yards each. The binding makes the quilt, and I'm glad I used a darker fabric to offset the others.

And a monogram because I just couldn't help myself. A handmade gift is always good, and a personalized one even better.


Still plugging away on the big white quilt and I will hopefully have an update to post soon. If people just didn't have birthdays or weddings or babies, it would be a whole lot easier to finish the projects I promise people. :) Pin It

Wednesday, October 21, 2009

Less Spooky, More Cuteness (or the $6 Halloween costume)


So I finished my 17 month old's Halloween costume and have to admit that I really like it. My 3 year old decided to be a firefighter this year (thanks to the generosity of his very sweet Aunt - so appreciated!) and I wanted to make both boys' costumes coordinate but not necessarily match. And it struck me: the baby can be a dalmation dog! I saw a really cute little DIY get-up in Parents magazine, but it gave no instructions. Thus, I came up with my own directions - a very loosely organized Dalmation costume tutorial.

First, I bought a white long sleeve onesie for $5.99 at Target (from the little girls department because apparently boys don't need things like this very often). Then I went home and made pants (using my jammy pants method) out of a matching white jersey knit that I already had on hand (sometimes it really pays off to have a fabric buying problem). For the pants pattern, I did use a fitted pair of jeans rather than jammies.

here's a picture of the top

For the spots I ironed some of the fusible applique stuff (must really try to remember the name of that...) to the back of some black suedecloth that I had from my cloth diaper making days (now it pays off to buy fabric and to hang on to it forever...) and cut random circles out of it. By the way, it only took about an 8x8 square to get enough circles. You could also use adhesive felt but I like how soft and flexible the suedecloth is....and I already had it, of course. I laid out the spots on my onesie and pants and then ironed them in place.

the completed pants

It didn't quite look complete so I just had to add a collar to the get-up. Wouldn't want to quit while I'm ahead. I took a 2 1/2" strip of red cotton (had it on hand...aforementioned fabric problem paying off), folded it in half and stitched down the long edge. Then I turned it right side out and ironed it flat.

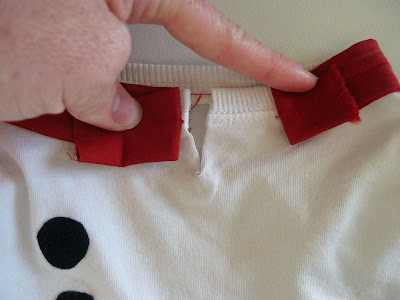
Here is where you can learn from my mistakes. Sewing it on at 10:00 at night was not a good idea because Mommies are tired at that hour. It started out well but then I realized the next day that I had lost all the stretch on the neckline of the onesie and would never ever get it to fit over the top of my little one's noggin. So, here was the solution: I ripped out the seams in the back and cut a vertical slit in the onesie (it's jersey and will only be worn once so I wasn't too worried about fraying).

what it looked like before...
after ripping out seams and cutting the slit...

Then I added velcro to the ends of the red fabric for a closure. Just happened to have red sew-on 1/2" velcro on hand...I may really have a problem with fabric and notions now that I think about it.

And, now my little one has a costume for $6. Yeah! Here's a little action shot...he's not easy to catch holding still, but you get the idea. :) The only trick is keeping a white costume clean until Halloween with two little boys in the house...
Pin It

Tuesday, October 13, 2009

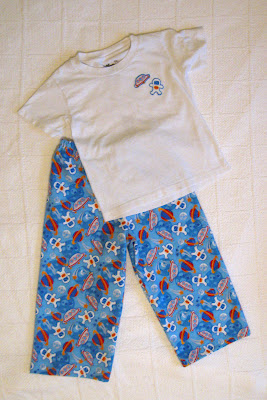
15 minute jammy pants


Update 4/12: after sewing for a couple more years, I realized this little tutorial could use some revisions.
If you've made them before and the directions look slightly different, that's why.
You will still get the same adorable end result plus slightly better technique. Promise!


No joke. These are the quickest little pants I've ever made...No pattern to create or follow and only one cut for all the pieces. And just think of the Christmas & Birthday gift possibilities...

My 3 year old "caught" me making pants for my 17 month old's Halloween costume (oh c'mon, like you're surprised I'm making it). Immediately, he wanted his own pair of pants. I duly promised him his own pair of pants to wear as pajamas. Last night, I realized that bedtime was fast approaching and I had no jammy pants to offer up. Panic ensued. What to do??! Throw together a pair of jammies during bath time. Of course. My panic can now work to your benefit. Here is how to guarantee lots of snuggles and "I Love You"s from your little one at bedtime...

You'll need prewashed fabric (I prefer flannel for this project), elastic, and a pair of kid-approved jammy pants. As with most of my projects, I did this one in the evening while the kids were sleeping. No natural light to make pretty pictures, but they get the job done.

First, take your fabric and fold it lengthwise selvage to selvage (right or wrong sides together, it doesn't matter). Then fold the selvages separately back toward the center fold.This is hard to explain and even harder to get a picture of, so here's a sketch...I apologize for the questionable skill.
The only thing that's really important is that both your folded edges match up like this.

Fold your pattern pants in half and line up the straight side with the folds of your fabric. Trace around the pants adding about 1/2" to the vertical edges. Add about 1 1/2" to the hem and waistband (horizontal) edges. Remember to compensate for the elastic waist in your pattern pants: create a straight vertical line above the curved section and leave your folded edge intact. Look at the next picture where it's been cut to see what I mean.

Leave your fabric stacked neatly just as it is. Cut out your pieces.

Next lay your cut pieces right sides together like this. This is why I prefer flannel: it sticks together like an old school felt board from Sunday School. No pins necessary. Yeah! Then sew it up along the curved sections (the crotch seams) using an interlock or zigzag stitch, or put it through your serger.

Now you'll lay out your pants so they look like the picture below. Line up the front center and back center seams so they match and pin the in place. I don't do any other pinning right now. Instead, I just line it up and start sewing at the center seams down one leg seam. Then I put it in the machine at the center seam again and sew down the other leg seam. This keeps your center seam where you want it. Again, use an interlock or zigzag stitch, or put it through your serger.

Now it's time to make a casing for your waistband elastic. Fold over the top edge of your pants about 3/4", then 3/4" again, pin and sew all the way around. Leave an opening at the back center seam (they're identical by the way, so just pick one) to insert your elastic.

Feed your elastic through and stitch it together at the length you want. Trying your pants on your pint size client is the best way to determine your elastic length.

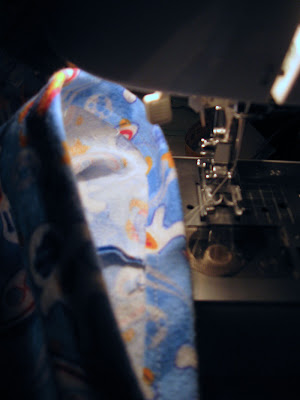
Turn your pants right side out and appreciate how cute they are...but you're not done. I find it easier to sew the hem when the pants are right side out so this is what we'll do next. Fold your hems under about 3/4" and then 3/4" again and run them through your machine like so.


And NOW you're really done. I promise. Step back and admire your handiwork!

Extra Credit: If you just can't stop yourself, whip up a little matching top for your pants using your pants fabric and the fusible stuff used for appliques. Super easy and flannel makes nice velvety soft appliques.

If you use this tutorial I'd love to see your creation! 
Feel free to post it to the Handmade Mommy Tutorials Flickr Pool.
Pin It

Rite of Passage

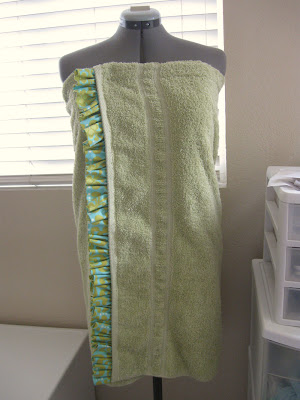
At some point awhile back I stumbled upon a tutorial for a spa towel wrap. The idea stuck with me and I picked up a towel on clearance for $3.50 about a month ago. Then I tried to find the tutorial again. It turns out that just about every crafter out there has made a towel wrap except me. There are so many tutorials out there that it suddenly seemed like some kind of sewing rite of passage that I had to check off my list.

So, I present to you my first spa wrap!

the elastic at the back...
All it took was a bath towel and about 1/4 yard of fabric. It will, of course, be a Christmas gift. I love this Farmer's Market fabric line by Sandi Henderson, and for whatever reason I really love that it doesn't perfectly match the towel. I can't put my finger on it but something about the shades of green together with that blue...I'm in love. Let's hope I actually give it as a gift and don't keep it for myself.

Oh, and here are a couple of the tutorials I referenced while making it: centsationalgirl.com & colourfulthreads. No need to reinvent the wheel when so many talented bloggers have put together such helpful instructions. But, I will say that it was much easier to secure the elastic and velcro before folding over the top of the towel to create the casing. Just a tip.

If you need to whip up a quick gift, this is your kind of project (or rite of passage, however you want to look at it). Pin It

Monday, October 12, 2009

Because who doesn't like a giveaway?

So I just discovered a fun new blog called "i hope i win" chronicling nothing but giveaways. It's run by the same sweet mom who writes Made.

Through "i hope i win" I found " noodleheads" (what a cute name!) and this giveaway for an adorable zippered bag. Head on over quick because it ends tonight. And, seriously, who doesn't like fun free stuff??

Happy Monday! Pin It

First Date

Last week I had my first sewing date with some very sweet ladies and loved it. I didn't actually sew at all (kind of like a book club where you don't read any books and not at all like the industrious ladies pictured...) but we talked about sewing and helped one friend make a project. Few of my longtime girlfriends are into sewing (yet...it's only a matter of time) and it was so fun to hang out with people who totally got my obsessive hobby.

And, most importantly, I think it helped me find my inspiration again. I wasn't feeling inspired to create at all for the last week or so - a bit of a funk. But, being with other people who share this creative urge was exactly what I needed. Off to tend to my little ones and find some time to stitch a little. Pin It

Sunday, October 4, 2009

Ah Shucks...

I am so thrilled!

I've just been featured on One Pretty Thing
for my little girl's smocked top/dress tutorial!

oneprettything

Go check it out so I'm not giddy alone. :)
Pin It
Happy Sunday

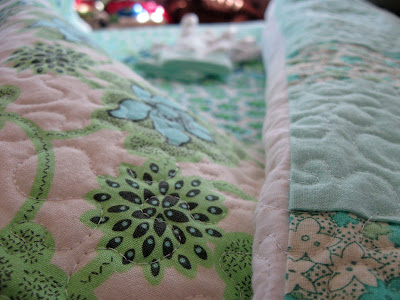
Today I got to get some quilting done. Ah...

As I walked away from my sewing table, I looked back and just thought it was a pretty sight. So here are some pictures of my work in progress. It may go to etsy for sale, or it may become a gift. I just can't decide yet.
The best part about this quilt is that I built it around only 4 fat quarters of Amy Butler Daisy Chain Aquatic. Love starting small and getting such a nice outcome.

Hope you had a great weekend! Pin It

Friday, October 2, 2009

Fall is in the air...


October...that really snuck up on me.

The temps have dipped into the 70's (downright chilly after our 100+ summer) here in sunny San Diego which means our version of Fall is just around the corner. Of course, as soon as I even thought of Fall, I thought of a Fall wardrobe. There's no "new wardrobe" budget in our house so this means I get to plan sewing projects. Geez, what a chore. :)

My first Fall 09 project is this little jacket from Chic & Simple Sewing. The fabric is a cotton/poly blend with a nice body to it that I bought at my local discount fabric store (Yardage Town). The trim and tie belt will be made with the Joel Dewberry print hung on the shoulder. And if I don't totally screw it up, I'll post a finished picture at some point.

By the way, I'm still on the fence about the Chic & Simple book, but since it's bought and paid for I'll try to get some outfits out of it. I did get this dress that I've lived in for the summer - well worth the time. And, if you live in the San Diego area, the no-frills Yardage Town is a must-see. Not only do they have all the essentials and great prices, the ladies who work there actually sew and are incredibly helpful.

Hopefully, Fall is inspiring you in some way this week. Have a great Weekend! Pin It

More Handmade Goodness

Related Posts with Thumbnails