

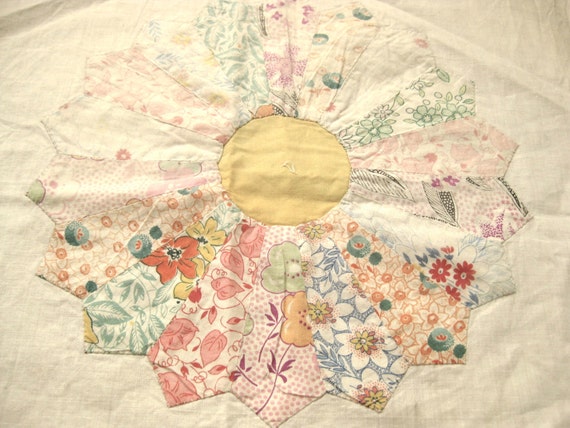
Dresden what? If you are a quilting nerd like me, you might know what a Dresden Plate is. If not, they are blocks that look like large flowers with different colored/patterned petals all around and usually a circle in the middle. I am in love with vintage Dresden quilts, especially the hand quilted ones made with flour sack fabrics around the 1930's. Every once in awhile I get on etsy and daydream about buying one...
A single block (listing here)
A really beautiful quilt (listing here)
Then I realize, "Hey, I quilt. I don't need to buy one."
While I do love the old Dresden quilts, I didn't want to reproduce them. For one thing, I think rehashing the same idea over and over and over is boring (apologies to traditionalists out there with crazy quilting skills). For another thing, the traditional Dresdens are just too "country" for me. So, I got out all my scraps and picked the brighter, more modern fabrics and did random mixes for each block and set to work...
One of these little rulers is super helpful. I got mine on Amazon with free Prime shipping and it even comes with a handy little bamboo turner. For this project, I used the 5" mark on the ruler.

Then I cut out 5" strips of all kinds of different fabrics and then used the ruler to slice them up like so.
Personally, I think the busier a print is, the better it looks on a Dresden Plate but you can ignore that, or course.

It was kind of meditative for me, but it does border on tedious to cut out what feels like a million little wedges of fabric.
You will be rewarded with a bunch of neat little piles though.

Then fold each wedge in half lengthwise, right sides together, and sew a 1/4" seam across the wider end.
After sewing, clip the inside corner and each one should look like this.

After clipping a whole bunch of corners, you too could have a miniature flock of tiny fabric cranes on your cutting mat. They so remind me of origami cranes that I kept the pile on my mat the whole time I worked because they're so cute.

Next, turn each wedge right side out, gently push out the corner, and press flat with the seam down the center. With this template, it takes 20 wedges. Pressed, you should have a stack like this.

Arrange them however you want. I tried to balance the circle with similar colors on opposite sides and I avoided putting similar patterns next to each other. But in the end, it's your quilt and you get to do it just how you want.

Sew all your "petals" right sides together along the long edge using a 1/4" seam allowance until you've joined all of them in a circle.

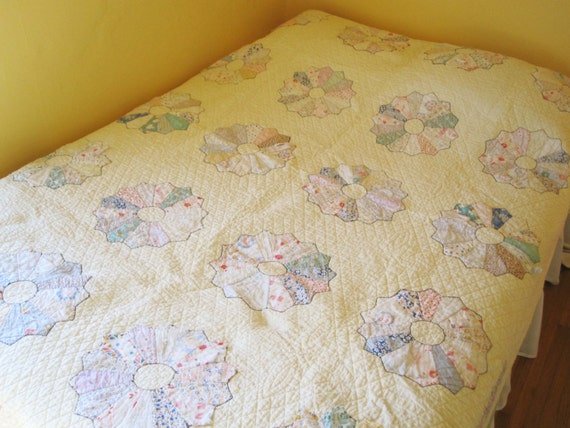
Now pile them all up and step back to admire your work!
You can applique them on a quilt, pillow cover, just about anything.
(Here's what I'm doing with the Dresdens...


No comments:
Post a Comment
I love hearing from you!