even a couple really cute brick ones (this one is my favorite & very similar to mine) .
But I have an aversion to paper mache.
Cruising baby, hairy dog, lots of time required...not ideal conditions. I'm a big fan of shortcuts.
And it turns out that a jumbo box of cheerios is just the right shape for a Lego brick!
You will need the following...(I got everything I needed in one trip to Walmart)
twin pack of cereal
wire coat hanger (the kind with the cardboard tube)
small party cups
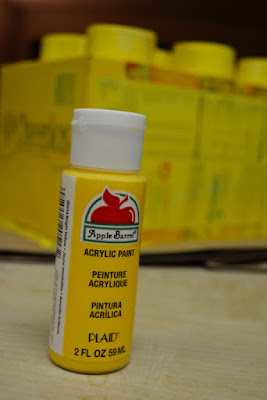
yellow craft paint & brushes
yellow tissue paper cut into long 3" fringe strips
masking tape
white glue
(Ignore the cardboard - I changed my plan. And the glue isn't in the picture.)
I wanted to create as few holes in the box as possible,
so I opened the top (took out the cereal of course) and put the wire part of the hanger in the corner of the box.
(it will hang at an angle now which I LOVE)
Then I poured the candy and toys in and resealed the box,
putting glue on the spots that had been glued before in addition to using masking tape.
Cut one inch off the bottom of your cups and tape onto the front of your pinata.
Give the whole thing a coat of paint...
At this point, I got paranoid that my pinata would spontaneously fall apart and put more tape on.
It can't hurt, right?
Cover your "bumps" with tissue paper using a thin line of white glue & give it another coat of paint...
Now put your tissue paper fringe all over, using a thin line of white glue for each strip.
I would start from the bottom and go up, and save the front for last.
(I didn't do it this way, just realized after the fact that it would have been smarter)
(I didn't do it this way, just realized after the fact that it would have been smarter)
This will be hard to bash open and you'll probably want to cut a pull string trap door in the bottom
for after the kids take a few turns and your pinata isn't giving up the goods (lesson learned after the fact...).
You'd just cut a hole about 3"x3" in the bottom and attach a ribbon loop to it.
Then seal the hole with a piece of tape so it stays closed for bashing but opens when pulled.
When it's done, fold over the hook at the top to make a closed loop.


Hey Kari, I had no idea you did the pinata yourself. It was so cute and fun! The kids had a great time at the party.
ReplyDeleteI am going to try to make this pinata in the next day or so for my son's 6th bday- thanks for the detailed instructions and pictures, will keep you posted on the outcome
ReplyDelete