Monday, April 30, 2012

Hello Monday

Another week. Another sick kid. My poor 5 year old is wiped out today with a bug. So we're laying low at home on this grey day. I've been trying to work out a birthday gift for my grandmother who turns 90 (longevity!) in a couple weeks and playing around with the idea of a family tree.

Etsy has some beautiful stuff. As always.


And I really want this one for myself.
Seriously. Genius.

Pin It

Friday, April 27, 2012

One for the guys

My husband's birthday is here and he loves it when I sew for him. 
Sadly, this is pretty rare aside from the occasional mending and the fishing reel bags

This year, however, I managed to copy his favorite pair of boxers (which he has loved to death...you know what I mean, right?). 
I've never copied a piece of clothing like this and really enjoyed the process. 

{I love the little 1 year old hand reaching into the frame. Ah, my constant companion.}

 I managed to get the dimensions and stitching spot on, but can you tell what's missing?
Oh yah, the FLY!!!
Someone should have warned me that sewing a fly is a learned skill, not something you should try and wing.
Want to know what happened to the first fly I attempted?

Uh huh.

So, the boxers have no fly. 
Even though it seems very similar to giving a hand knit  sweater with uneven sleeves,
I'm hoping my effort and thoughtfulness will win out over this little omission...

I did try and make up for it by adding a twill tape "tag" in the back since it's awfully hard to tell which is front & back without a fly. (idea totally stolen from Anna)

I am happy with the double row of stitching for the hem.
 

And I learned how to do a flat fell seam!
Fabulous new skill to have! (learn here)
 

Here's hoping he likes them!
Pin It

Monday, April 23, 2012

Hello Monday

Our weekend was full of little moments and lots of time at home.

Some of the best parts were...

Daddy's homemade pizza
Chutes & Ladders
Everyone snuggling in Mommy & Daddy's big bed
Orange Bang
Dinner with Grandma & Grandpa
Napping
A little wine
A Mommy slumber party (the boys had been begging me to sleep in their room one night - so sweet)

I hope you had a restful and fun weekend with your loves.
Pin It

Monday, April 16, 2012

Busy Bag Tutorial!

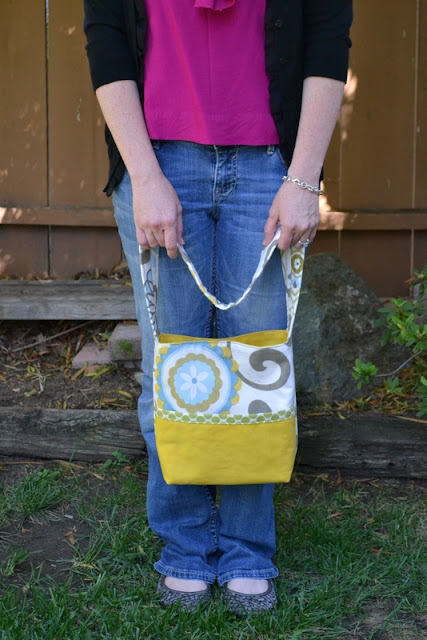
Thanks to Rachel, we've got a name for my little bag...the Busy Bag!
How appropriate for this busy lady, chasing 3 busy boys around.


And, thanks to a few stolen moments with my machine & camera, we have a tutorial for said bag!
As always, customize the dimensions to your heart's content.
These are basic dimensions and how-to steps so you can make it your own.
*Tutorial for personal use only*


Materials
3 cuts of 12 1/2" squares lining fabric (duck cloth in this tutorial)
2 cuts of 12 1/2" squares of body fabric (canvas print here) 
6"x32" piece for strap, backed with fusible fleece
12 1/2" piece of straight or bias binding
2 scraps of coordinating fabric for interior pocket (mine are 5 1/2"x6 1/2")
magnetic closure + 2 small squares (about 1 1/2") of heavyweight fusible interfacing
8"x3" piece of plastic canvas
coordinating thread
{Unless otherwise noted, I used a 1/2" seam allowance for this project. 
Seems sturdier for an everyday bag.}

note: You can use any fabric you want - your project, your rules. That's why we sew, right?
But if you use a quilting cotton or other lightweight fabric, make sure you back it with fusible fleece before sewing to give your bag nice body.


For the interior pocket, sew 2 rectangles of fabric wrong sides together using a 1/4" seam allowance, leaving an opening to turn.
Clip corners, turn right side out and press.


Stitch to the right side of one of your lining pieces with the opening at the bottom of the pocket to close it up.
 

For magnetic snap placement, mark both your lining pieces 1 1/2" from the top and centered horizontally, 
 

Iron your interfacing over that mark on the wrong sides.


Attach your magnetic closures on the right sides.


Fold your strap piece in half lengthwise, right sides together and sew down the length.

Turn right side out, press with the seam centered and topstitch along both edges.

Decide how big you want your outer pocket (example: 12 1/2"x8")
and edge stitch binding along raw edge that will be the top of your pocket.


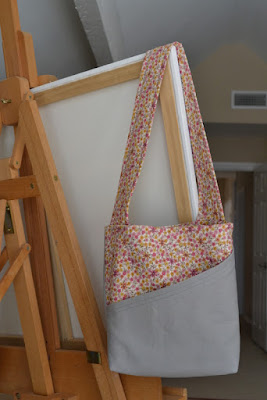
You can also do this on an angle, like the first bag I made...

Sew your lining pieces right sides together down the sides and across the bottom, leaving about a 5" gap at the bottom to turn.
You will put the plastic canvas through this opening later, so don't make it too small.

Next, match up your body pieces right sides together with the outer pocket in between.
Like the picture below...

Sew these 3 pieces together, down the sides and across the bottom, no opening for turning needed.

Box your corners on both the lining and body at about 1 1/2" from the end and trim excess.

They should look like this...


Now pin and sew your strap in place, centered on the side seams of the body with right sides together.

 To reduce bulk in the side seams, pin the seam allowance open like so.

Nestle the body inside the lining, right sides together with the strap tucked down between them.
Pin and sew all the way around the top.

 Pull the body through the opening in the lining...
 

 and it should look like this.

Push the lining down into the body and feed the plastic canvas through the hole you used to turn.
Edge stitch the opening closed. 
Reposition the canvas so it fits nicely at the bottom of your bag.
You could hand stitch the canvas to the lining inside to keep it from shifting too much but this seemed like a hassle to me.

Press and pin along the entire top edge of your bag.

Edge stitch around the whole top and you're done!!

Now go somewhere fun!
Or, maybe go to the grocery store or your kid's gymnastics lessons.
Like I do.

Pin It

Wednesday, April 11, 2012

my favorite superheroes

Let's say you have a house full of boys. Who happen to love superheroes (almost as much as their Mommy).

And let's say these boys need new summer jammies because they grow like weeds and the weather is warming up in San Diego.

What a wonderful problem to have! 
The perfect excuse to dust off the 15 minute jammy pants tutorial and freezer paper stencil some shirts!

I still follow my own tutorial to make these...is that good or bad?

My boys have good taste, too.
Batman pajamas? Green Lantern pajamas? Classics.


And how could you not love freezer paper stencils 
when you can go from this


to this


to this in no time?!


And what good are new jammies if you can't jump on Mommy & Daddy's bed?


And tumble on Mommy & Daddy's bed?


 And giggle on Mommy & Daddy's bed?


shhhh....don't tell Daddy!
Pin It

Monday, April 9, 2012

hello Monday

I hope your Easter was wonderful! 
Ours was relaxed at home with lots of candy, eggs, and giggles.


We even got to dye eggs with my Dad, who just happens to be the KING of Easter egg dying.


 I wish we could have gone to church but I was fighting a sore throat so we stayed home.
But, if you have a 5 year old dying Easter eggs with you, he'll remind you of the real purpose for this sunny Sunday in April...
"For the cross, Mommy"


 And who lives in a house full of boys?
I do!
Pink & sparkly to make up for the motorcycles, flames and eyeball eggs...
oh yes, my Dad has mastered the art.


I did my fair share of dying pink eggs, but my husband caught me doing what I usually do...


 I hope your week is off to a great start (with or without a Peeps hangover...)!
Pin It

Friday, April 6, 2012

Winner Winner!

So I LOVE that you guys helped me out naming my little bag. And you all were way more creative than me! 
(the "not-a-diaper-bag purse? really, sometimes I wonder about my creative abilities...)
But my favorite, by far, was the "Busy Bag" by Rachel R. 
I'll email her and find out what colors she wants her own bag in.

While I make hers, I'll also put together a Busy Bag tutorial (hopefully with some options for you) and post it sometime next week.

Oh, and another picture to wrap up our Spring Break week.
The boys and I walked and biked around Miramar Lake here in San Diego. 
It was a perfect day.


Have a great weekend! Thanks for your help!
Pin It

Monday, April 2, 2012

Hello Monday

We've officially started spring break here and kicked it off with lunch at the beach. 
I hope your Monday was a good one.


I just love that wispy baby hair...

Happy Spring Break wherever you are!
Pin It

More Handmade Goodness

Related Posts with Thumbnails